Tuesday, December 25, 2012

Merry Christmas 2012

 We are enjoying our very first Christmas here in the new house, it is such fun to be here this year , we are very grateful to be so blessed.
 I won third prize for the Holiday Decorating Contest on HGTV.ca last week , how neato, I won my self a faux fur blanket !!!


 We did get a tiny bit of snow ,  just the way I like it .

 I even moved a little furniture around , I moved the dining table into the kitchen and it turns out we really like it in there! It may stay. How cute are those Santa faces I thought they were sweet.
 I had to make my sugar cookies of course.
 Beautiful gold and mercury votive holders from the dollar store 63 cents each...

 most of the food was inspired by Pinterest...


I assure you I did eventually iron that table cloth...

I hope you have a wonderful holiday and spent time just the way you wanted to , Merry Christmas and Happy New Year,
from your friend,
Chris

Tuesday, December 18, 2012

Quick pic's

 Sophie and I worked on this Christmas tree over the weekend. I got the idea from Pinterest of course, we used an image for a guide , I drew the tree and Sophie , my 11 year old did all the rest, she is pretty great!

                                                                           
 One more detail was recently found for the front living room. I have been looking for a coffee table for a while now but nothing seemed quite right , or was too pricey to commit to , I am not a buy expensive keep forever kind if girl. So I searched and searched and even thought about building something but then I found these super unique cubes ...I knew as soon as I saw them , they were perfect. Heavy and affordable and versatile. They are so smooth and match my bamboo blinds perfectly, win win.

Sometimes things just take time to find. 
The count down is on for Christmas , everything seems under control here , still no snow , yippy for me !!! life's just easier without snow in my book . It's always a wait and see if we will have a white Christmas , as long as we have a safe Christmas and we are together that is really all that matters to me , for us Christmas is about togetherness and family. 


Lilac tween bedroom make over

When I asked Sophie a year ago what colour she would like for her room  she was very clear , light purple , or lilac. We ordered the fabric, the chain fabric and everything came from there. We definitely kept the choices simple lots of white and lilac. Satin sheets is the colour we chose by Para paints.
The headboard I made we kept white with chrome tacs. 
The duvet cover we found at Ikea for $14...what a deal and I loved it because it was so full of colour and most importantly purples and lilacs.
The lamp I got at Walmart a few years back and re-covered .

 Cute little convex mirror I found at Winners lately .
lamp shade , finished before the painting had begun

Simple laser cut art from Ikea , the ceiling light we found at Rona.
before the painting
What a difference a coat of paint makes, this room feels so pretty and much more complete, although it is not done. 
Still to be done in this room is to customize the closet which will allow us to get rid of the dresser where I will create custom built ins, benches and bookcases, but that can wait till spring.

I am so happy to say Sophie my daughter loves it , and that makes me so happy!

Monday, December 17, 2012

A Christmas WIsh

My Christmas wish this year is that the community of NewTown feels some peace, I am so sorry that this terrible event has happened.
We all grieve for their loss , my heart aches for all the lives lost.
When I read the news I felt sick and hoped this information was wrong.
There is nothing more precious than our children , as a parent Friday's events are unimaginable.
There is evil in this world , people are troubled but there is so much more good in the world , share your goodness and love.
I hope that all goes well today for all the students and teachers , today will be a hard day throughout all schools.

So very sorry today and always, we are better than this...

Thursday, December 13, 2012

Easy lamp shade slipcover tutorial, not one drip of glue

 a few years ago I shared on this blog how I slip cover my lamp shades .I thought maybe I should share the step by step process of how I do it , just in case you want to do it also.
Have you ever gone lamp shopping only to find a lamp base you love but you hate the shade or you love the shade but hate the base, well for a long time that was something I struggled with until I got the idea to slip cover a lamp shade.
                                                                   
 Using a drum shade is the easiest because of the straight sides but any lamp shade can be slip covered. When doing a cover for a traditional shade the slip cover will have many pieces to contour the shade. I cut out a strip of fabric the same width of the shade and cut it long enough to wrap around the shade as well to allow for seams.Add at least 2-3" of excess.
 I then cut 6 cm strips of a co-ordinating fabric to make the edging to cover the raw edges and to create a nice finished look.

 I iron the out edges into the middle as in the photo and then folded it in again to create a 1.5 cm wide binding type strip , you could also buy your own pre-made bias tape or better yet use the same fabric as is on your shade and cut strips out of that fabric on the diagonal and make your own custom bias tape
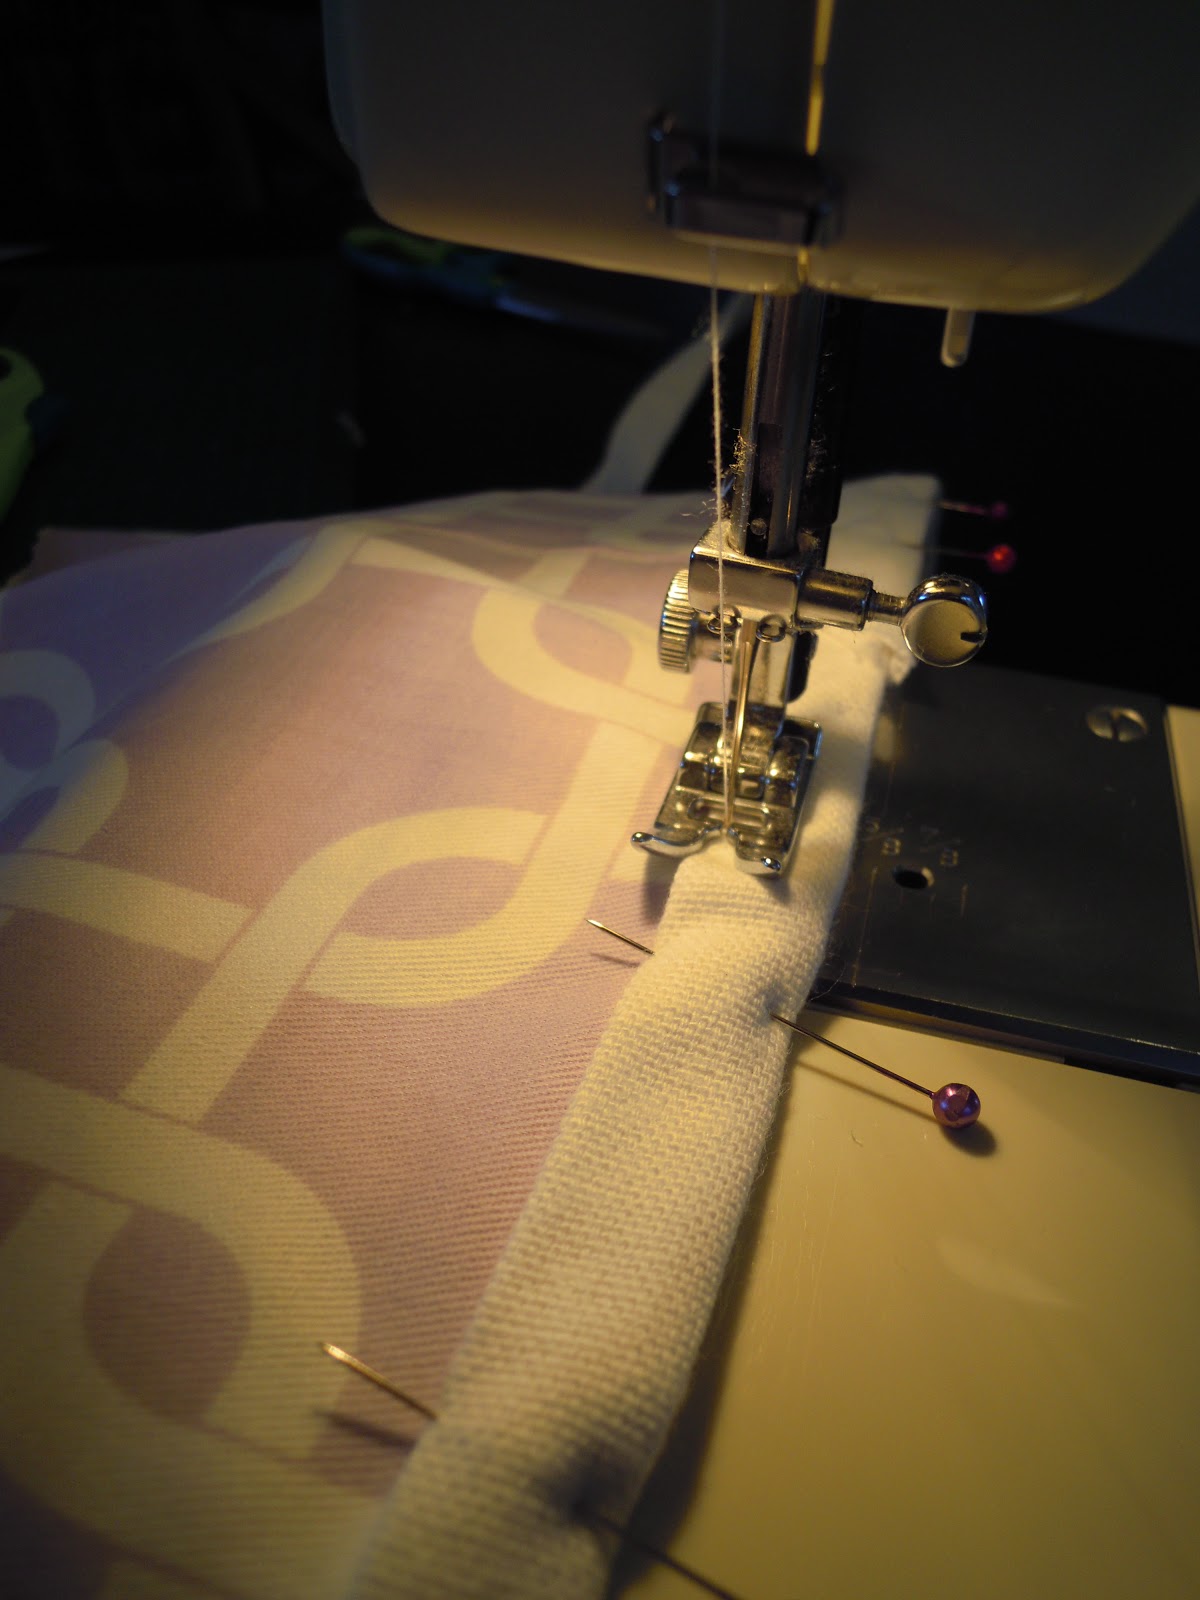
 I then moved onto sewing the shade slip, just pin it snugly around the shade and then remove to sew the seem closed. Do this step inside out.
 while sitting the shade on a flat surface trim any excess fabric from the edge to make the fabric even with the shade
 using your sewing machine sew the seam just slightly to the inside of the pins, this will create a snug or tight fitting shade cover that will simply look like a custom shade.
 press the seam with a hot iron to keep your project tidy and professional looking
 using pinking sheers trim down the seam allowance to about 1/2"
 pressing the seam before trimming it
 next I turn the fabric right side out and then I sew down the seam
 this step makes it look so tidy and well made
 next pin on your edging so that the trim fits right over the raw edge , pin in place and sew on to the slip
 close up
 I kept the seams to one spot and face this side of the shade to the back.
 I find this is a pretty simple sewing project that takes between 30-45 minutes , time well spent to get the perfect lamp shade
finished lamp shade slipcover
So here is the question , do you sew ? will you learn ? I can't imagine not sewing , I have made endless curtain panels , pillow covers and lamp shade covers over the years while decorating our apartments and homes.
I would suggest if you don't sew learn how to , it is a really handy skill.

Wednesday, December 12, 2012

Photo editing with PicMonkey,a little tweeking makes a big difference

 What a difference a little photo editing makes. For too many years I just posted whatever came out of my camera, but then I learned about Picnik....but Picnik went away and I felt sad. It was so user friendly and very fast to use. I was very happy again when it returned as PicMonkey.
So what did I do to the photo above ? Well I cropped it , I worked on the exposure , color , sharpened it and then added an effect . My favourite effect is Dusk, love it.

 What an amazing difference , right! I was NOT asked to promote PicMonkey I just love it . Hopefully no more sideways photos will be added to Facebook, there is no reason to have shabby pictures.
You can play with endless possibilities , skies the limit. You want to make a collage or a header add text or a new Facebook cover photo, well what are you waiting for?

Monday, December 10, 2012

Christmas lights and Pinspiration

 We made our annual trip to see the Christmas lights last night, first we enjoyed a nice dinner as Swiss Chalet then stopped for a hot cocoa at Tim Horton's for the girls. These are two of my favourite houses. This first one reminds me of Martha Stewart, so simple and classic, beautiful.
 And a large log house , so charming with icicle lights and giant candy canes. Turns out this is my neighbours sisters house , small world. It's pretty magical.

 I have recently been inspired from some brilliant projects I have found on Pinterest. I decided to dive in with a little project , a painting. I have had a canvas laying around for almost 2 decades!!! just waiting to be used. Better late than never.
 The hardest part was coming up with the text. You can choose whatever you like which makes this such an appealing project. I applied the vinyl letters and then started applying polyshades classic black stain and poly. I did three coats , immediately after the third coat I used a wire brush to create a cross hatch pattern to add a little interest and dimension. I used polyshades because I wanted some nice sheen for dimension. You can use any paint or color. You could even do this right over an existing canvas with a print , you would get more of the effect of the image below. The possibilities are endless. Follow my Pinterest board named Awesome DIY , and my main board here http://pinterest.com/chriskauf/
http://southernbellesoulmountainbrideheart.blogspot.ca/2012/06/quotes-of-amazing-father-diy-quotes-on.html
Here was the pinspiring image that drew me in. Canvas , vinyl letters and paint, voila one of kind creation.

So would you make your own art? Want to share your favorite Pinterest DIY pin, leave a link in my comments I'd love to see.
Thanks for stopping by , happy Monday. 14 Days till Christmas , are you ready?